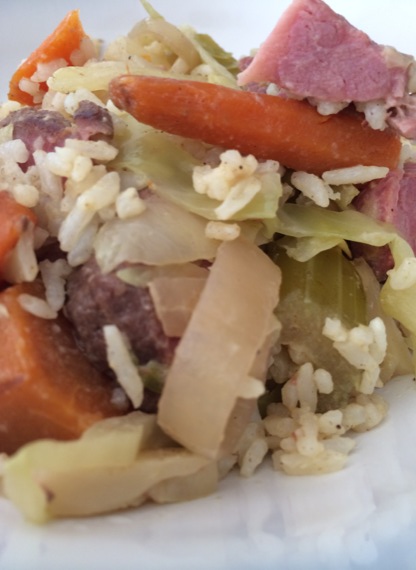
The latest entry in the “Weird But Good” category… or is it the “Ugly But Good” category? Who knows? This was both weird and pretty ugly, too. But, it had the taste of corned beef and cabbage in every bite. And, it was super quick and super easy. After two days in a row of corned beef sandwiches. I was getting bored. And, there’s one reason this works. By adding the corned beef at the last minute, it stays tender and moist. Corned beef doesn’t reheat well. So, here, I just added the roughly cut pieces at the last minute. This allowed the meat just enough time to heat properly, yet retain a decent color.
Corned Beef Stir Fry
makes 1 large bowl
(2-3 servings)
1 Tablespoon butter
1 cup sautéed cabbage
a few pieces of leftover carrots and celery
1 Tablespoon Dijon mustard (or coarse grained mustard)
1 cup leftover white rice
2 slices of corned beef, cut roughly into pieces
generous sprinkle of freshly ground black pepper
fine sea salt, to taste
Heat the wok and add butter. Add cabbage. Toss gently and allow to heat evenly. Then, add mustard and rice. Stir to combine. Allow to heat thouroughly. Then, add chunks of leftover corned beef. Stir to combine and cook for about 1 minute.
From start to finish, this lunch took less than 5 minutes to make.
This is possibly the best corned beef that I’ve ever made. How did I do it? There were a couple factors that I believe led to this. First, I sautéed the cabbage separately. This made the cooking day much more enjoyable. The smell of cooking cabbage is not a good thing. Second, I created my own spice blend. And, thirdly…

Bundaberg Ginger Beer & Tommyknocker Imperial Nut Brown Ale
This ginger beer is slightly spicy and not too sweet.
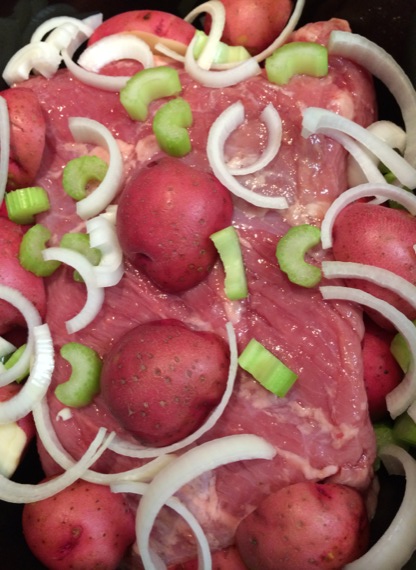
After artfully arranging the corned beef, potatoes, onions and celery, a thought occurred to me. It might be a good idea to have a layer of potatoes on the bottom. So, this was disassembled and reassembled.
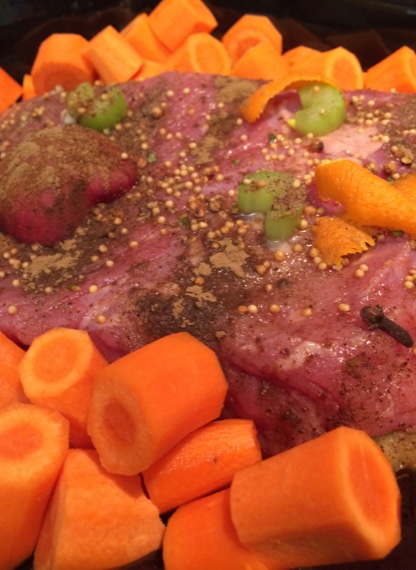
Even adding everything at the same time, it all cooked up nicely. The potatoes and carrots were firm, yet tender. But, they weren’t exactly pretty. I might experiment with adding the carrots and potatoes at the halfway point next time.
Slow Cooker Corned Beef
1 onion, sliced
3 stalks celery, sliced
8 red potatoes, halved
5-6 carrots, sliced
1 can Imperial Brown Ale
1 can ginger beer
1 bay leaf
1/4 tsp ground bay leaves
3 whole cloves
1/4 tsp ground cloves
1 tsp mustard seeds
1 tsp black pepper, freshly ground
1/2 tsp allspice
1/4 tsp cinnamon
2-3 slivers orange peel
3-5 whole coriander seeds
beef stock, as needed (about 2-3 cups)
Turn the slow cooker to high.
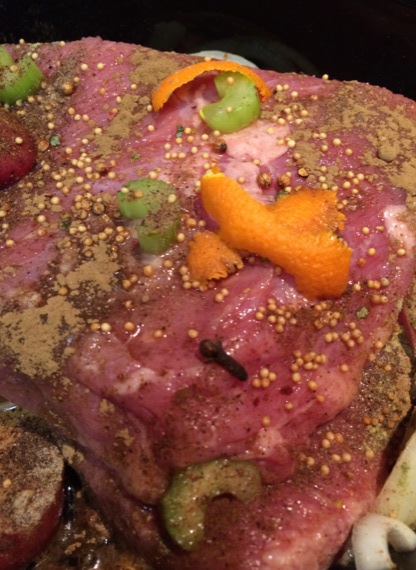
Arrange potatoes on the bottom of the slow cooker. Then, add about 1/3 of the sliced celery. Place the corned beef in the center. Then, add remaining celery and carrots around the edges. Tuck the bay leaf under the carrots and all all of the spices. Pour ale and ginger beer on top. Then, add beef stock that’s been brought to a simmer. Check after 1 hour. If simmering, reduce to low and cook until tender. Depending on the size of your roast this could take from 4-6 hours. You’ll know the roast is tender when a fork slides into the meat easily. After serving, allow the remaining meat to reach room temperature in the cooking liquid. This will keep the meat moist and tender.
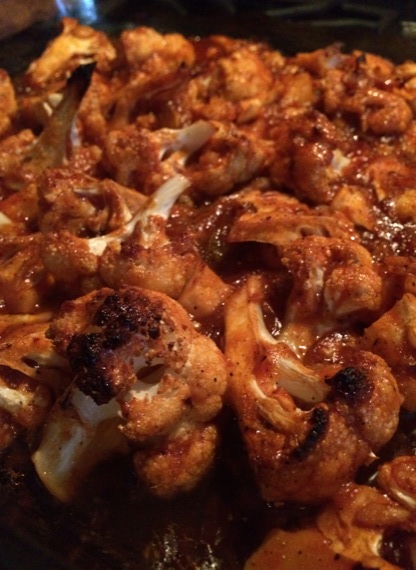
The dry version of this dish usually includes deep fried cauliflower florets that are then tossed with the spice paste.
We turned the leftovers into a quick and easy fried rice.
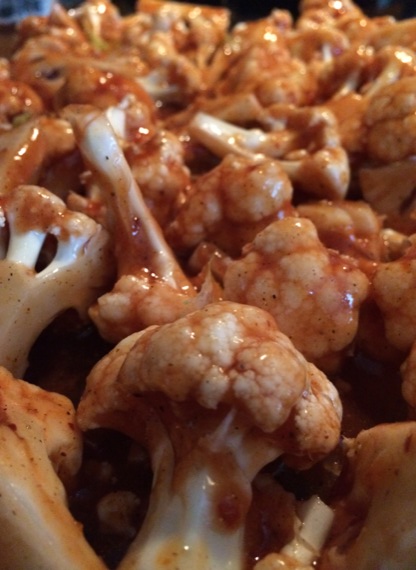
Manchurian Style Roasted Cauliflower
1 head cauliflower, washed, cut into florets, then quartered
1 cup ketchup
1 cup water
4 Tablespoons corn oil or peanut oil
3 Tablespoons brown sugar, honey or date sugar
6-8 cloves garlic, minced
1 tsp red pepper flakes
1 tsp cumin
1 tsp coriander, ground
1 tsp onion powder
1 tsp black pepper
1 tsp fine sea salt
1/2 tsp cayenne powder
Preheat oven to 425 degrees F.
Combine all sauce ingredients in a large mixing bowl. Stir to combine. Then, add cauliflower pieces and toss to coat. Arrange in a single layer on a 9 x13 inch baking dish. Roast for 40-45 minutes, or until roasted to your taste. At 45 minutes the florets will still be firm and possess a pleasant chew. After 45 minutes, check frequently for doneness.
What’s the difference between black bean soup and black beans with rice? Well, for black bean soup you mash a portion of the beans for a rich, thicker soup. That’s about it. All the rest is purely personal.
Inspired by the recipe in Memories of a Cuban Kitchen, this is my go-to black bean soup recipe. Over the years, I’ve made a few tiny changes. I’ve added some carrots and celery… and a splash of brandy… and a little pinch of red pepper flakes. Oh yeah, I use beef stock instead of water, too.
This time, I tried using chicken stock. Why? Well, it was all I had on hand. It was quite nice, too. But, I really prefer the beef stock. It adds a richness, depth, and complexity. So, next time, I’ll go back to my old standard.
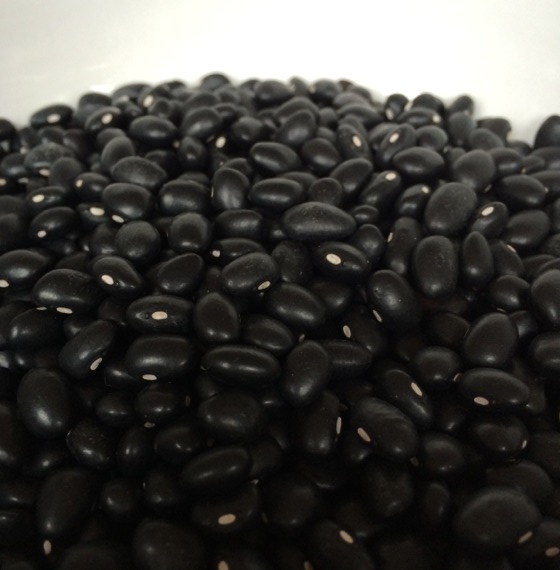
Black Bean Soup
makes 1 big pot
1 – 14 oz bag black beans
1/4 cup olive oil
1 large onion, diced
6 cloves garlic, minced
1 green pepper, diced
2 carrots, sliced
1 stalk of celery, minced
1/2 cup brandy
4 cups beef stock (or, chicken stock)
1- 2 teaspoons cumin
1 or 2 bay leaves
1/2 teaspoon black pepper, freshly ground
1/4 teaspoon red pepper flakes
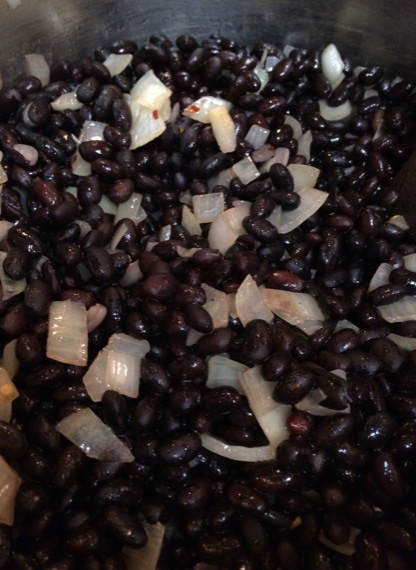
In a large dutch oven, cover beans with about 3 inches of water. Bring to a boil. Cover and set aside for 1 hour.
Drain beans and place in a bowl.
In the original dutch oven, heat olive oil. Sauté onion for about 2 minutes. Add garlic, green pepper, carrots, and celery. Pour in brandy. Let the alcohol burn off for about 1 minute. Then, add black beans, chicken stock, cumin, bay leaves, black pepper, and red pepper. Simmer gently for 1-2 hours. After about 1 hour, smash beans to create a thicker, opaque soup.
Serve as a soup with a dollop of sour cream and a fine dice of sweet red pepper. Or, serve over rice for a heartier soup.
—
–
Or, Some might prefer this version.
–
—
Here’s another version that I’ve come up with. It seems to be very similar to restaurant versions of this dish. Smoky pork, no cumin and 1 teaspoon of oregano give this a completely different flavor. I have no idea which version is more traditional. Both are delicious. But, I must admit, this version with oregano comes in second place for me.
Black Beans & Rice
makes one big pot
1 – 14 oz bag black beans
1/4 cup olive oil
1 very large Vidalia onion, diced
1/4 lb bacon or bacon ends, diced
(or leftover mojo pork, cubed or shredded)
6-7 cloves garlic, minced
1 green pepper, diced
1 teaspoon oregano
1/4 teaspoon black pepper, freshly ground
6 cups beef stock
1/2 cup sherry or brandy
1 teaspoon fine sea salt
Optional Garnishes:
red pepper, diced
green pepper, diced
sweet Vidalia onion, finely diced
hardboiled egg, diced
cilantro, minced
In a large dutch oven, cover beans with about 2 inches of water. Bring to a boil. Cover and turn off the heat. Let sit for about 1 hour. Drain beans and set aside.
In the same large dutch oven, heat olive oil. Add onions. Sauté for about 1-2 minutes. Add bacon ends. Sauté for about 5 minutes or until onions and bacon are golden at the edges. Add brandy. Then, add garlic, green pepper, and oregano. Stir. Add 6 cups beef stock and 1 cup of water. Bring to a boil. Reduce the heat and simmer gently until beans are tender. Add another cup of water if necessary.

Guava paste is the secret ingredient behind many of the best Cuban desserts. Sure, guava jelly is an acceptable substitute. But, it’s just not the same thing. Guava paste has a depth, density and complexity that guava jelly never will. For baked goods, that density is the key. Extra moisture is the kiss of death for so many delicate pastries. Puff pastry, in particular, doesn’t puff as beautifully. If you are eating your pastry fresh out of the oven, this is less of an issue. After sitting for a few minutes, that dense bit of dough under the wetness turns extremely dense, doughy and unpleasantly gummy.
Phyllo Guava Pastries
phyllo dough
guava paste (or, jelly)
melted butter, as needed (about 4-5 Tablespoons)
powdered sugar, to top
Preheat oven to 375 degrees F. for about 5 minutes.
Then, on a parchment lined baking sheet. Fold one or two sheets of phyllo in half. Brush with melted butter. Spread the middle third with guava paste or jam. Fold one side up. Brush with butter and more guava paste, if you like. Then, fold the remaining third over the top. Brush generously with remaining melted butter. Bake on parchment-lined baking sheet for 8-10 minutes at 375 degrees F, or until phyllo is crisp and golden.
Let cool. Dust with powdered sugar. Then, cut into wedges or slices.


If there’s real Cuban bread to be found in Atlanta, we’ve yet to find it. So, what’s the best substitute? We believe it’s the gorgeously fluffy Vietnamese bánh mì. They’re much easier to find. And, they’re available at the incredibly great price of three (or, sometimes even 5) for a dollar. There’s sure to be a few of these loitering in our house at any given time. This pressed Cuban sandwich makes great use out of a day old bánh mì.
Pressed Cuban Sandwich
makes 1
1 6 inch piece of Cuban bread or your favorite mini baguette
good quality yellow mustard (and/or mayo)
dill pickle, sliced paper thin
boiled ham slices
roast pork slices
thin slices of swiss cheese (or, provolone slices if you’re in a pinch)
1 teaspoon butter, salted
Heat griddle, grill pan, or panini press to a moderate heat while you slice your bread. If you’re using griddle or grill pan, also heat a heavy cast iron skillet over high heat. Very lightly slather yellow mustard on both cut sides of your bread. (Or, could slather mustard on one side and mayo on the other.) Place paper thin pickle slices, ham, pork and cheese on your sandwich. Butter your griddle. Press sandwich together and place on buttered area. Place heated cast iron pan on top. After 4-5 minutes, or when bread appears crisp and golden brown, flip sandwich and replace the cast iron pan for another 3-4 minutes. Slice sandwich in half and serve with remaining pickle slices.
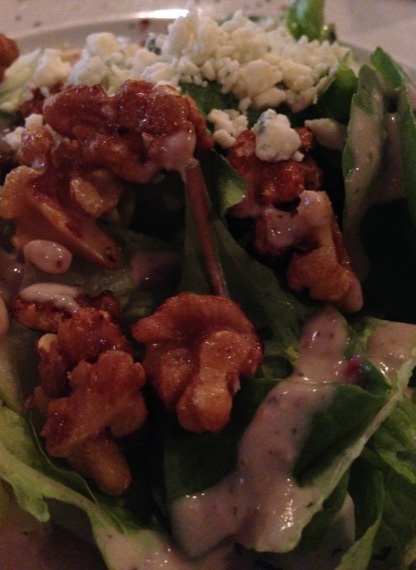
A handful of walnuts and a generous sprinkle of bleu cheese turn this simple salad into a real meal. For an even heartier meal, add a slice of grilled bread. Would you like a heartier option? Try a grilled cheese with brie.
Roasted Walnut Salad
baby lettuce
romaine
roasted walnuts or candied walnuts
bleu cheese
celery, sliced, if you like
Wash baby lettuce mix, romaine and celery well. Slice romaine and celery. In a large bowl, toss the lettuce. Then, sprinkle celery, walnuts and bleu cheese on top.
Raspberry Vinaigrette
1/4 cup red wine vinegar
1/4 cup raspberries (or seedless raspberry jam)
1/2 – 3/4 cup olive oil
1 Tablespoon Dijon mustard
1/2 tsp black pepper, finely ground
fine sea salt, to taste
Combine all in a powerful blender and liquify. If using fresh raspberries, you might want to add a tablespoon of superfine sugar (or honey, or maple syrup).

The Starting Point For This Hand-Hammered Wok
Given its size, this wok probably won’t be seeing daily use. That will make it slightly trickier to season. I’ve noticed that if a wok (or, any blue steel pan, really) sits for too long unused. It requires additional seasoning. So, for this this wok, I’ll be seasoning it to a rough 50% point.
To start, I heated our outdoor grill for 10 minutes. Then, I placed the wok on the grill and covered the lid. I set my timer for 15 minutes. Then, at the 15 minute mark, I flipped the grill upside down, shut the lid, and set the timer for 10 minutes. This removed the industrial strength oily residue. Then, I scrubbed the pan very well and towel dried it. Then, I set the wok over a moderate heat and applied a light coating of rice bran oil and vegetable shortening. At the first sign of smoke, I wiped the wok clean. Leaving only a very light sheen of oil, I set the wok aside to cool. I repeated this process three times. The next day, I placed the wok over moderate heat, added a bit of butter and olive oil to the wok. I let the butter come to a bubble and added an egg. It slid out beautifully. And, I had something to top my toast for breakfast!

Roughly 50% Seasoned

The Grilled Cheese Sandwich
So easy and so good, the simplest recipes require quality ingredients and a little bit of care. That’s all there is to it. The combination of good bread and very good cheese make this super simple sandwich something truly special.
We do have our own little secret. And, it’s a secret that we think makes all the difference in the world. The secret? Use very little butter. We don’t butter the bread. This requires too much butter for our taste. We like butter on this sandwich. But, we don’t LOVE butter on this sandwich. So, we like to use it sparingly. The star of this sandwich is the cheese. So, we butter the griddle. This requires just a little bit of care, moderate heat and a little bit of time. You will be rewarded with a golden brown edges on the bread and melty cheese inside.

Grilled Cheese Sandwich
makes 1
about 1 teaspoons butter
2 slices of rustic rosemary bread
brie, thinly sliced
a few crumbs of cave aged cheddar
Heat griddle with a moderate heat. Uniformly coat griddle with a thin sheen of butter. As the butter bubbles , place bread on the griddle. Carefully toast one side of the bread on the griddle to a light golden brown. Flip both slices of bread. Top one slice of bread with cheese. When the second side appears toasted, place the hot side of the toast onto the cheese. Plate. Slice. Devour.
Grainy mustard makes a lovely addition to this sandwich, if you’d like to add a touch of spice.
Ready for dessert?
Grill an extra slice of rosemary bread. Top with Georgia Belle Peach Preserves.

I love you

…my love
You are the light in my day, the blue in my sky, the air that I breathe…
…the reason to rise
I love you more and more with each new dawning day.
|
|


